Monday, 3 August 2015

Winnie the Pooh baby blanket - Part Two

I finished the blanket and I am quite pleased with how it turned out.  I have one more to make.  I'll probably move the bee a bit on the second one as I think the bee is too close to the name.  But, otherwise, I think it looks so much better than the cross-stitching I showed in the first post.


Sunday, 26 July 2015

Winnie the Pooh baby blanket - Part One

Quite awhile ago I purchased this pattern: (Click on the pictures to see a larger size)


The instructions for this pattern are to make a blank afghan and then cross-stitch the design onto it.

So, I made a few of the blanks and stored them for when I wanted to gift a blanket, all I would have to do would be the cross-stitching.


Well, the other day, I took one of the blanks out and started to cross-stitch the design but I wasn't pleased with the result.  Too much white showed through, the blanket became distorted (and was not stitching tightly), and the bulkiness of the stitched area was unpleasant.


I decided to start over and crochet the design as part of the blanket.  I will have to stitch the outline but that won't really distort or add bulk.  I'm almost halfway done (I'll post an update when finished).


Much better!


Friday, 17 July 2015

Craving Chocolate

What does one do when one craves chocolate but is too lazy to go to the store? Make brownies, of course!

Remember last fall when I canned some winter squash? Well, it works really well as a fat replacement in boxed brownie mixes. So, I took this:


Which ended up as a plate of these:


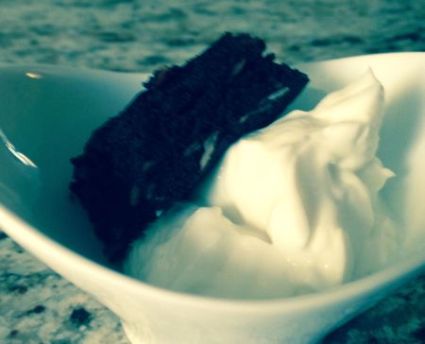
And, then I ate this (with vanilla Greek yogurt):


Acorn Squash Almond Brownies 

1 package brownie mix
1 egg
1/2 jar pureed acorn squash (pumpkin works, too)
A handful of nuts, I used blanched sliced almonds (1/2 cup, approximately)

Preheat oven to 350ºF. Mix all ingredients. Pour into a greased (I use Pam) 8-inch square baking pan. Bake for 25 minutes or until toothpick inserted in centre comes out clean. Cool for 5-10 minutes.

Sunday, 15 March 2015

Vegetable Stock (& Chicken Stock)

A couple of weeks ago I ran out of my homemade canned vegetable stock, so last week I made some more.  It's a pretty simple process, but it just takes time.

Essentially, toss a bunch of veggies and water together, a little bit of salt & pepper, simmer, strain, and you have stock.  If you also include some meat bones, you have meat stock.  Canning is the same whether you have meat or vegetable stock: 25 minutes at 15 lbs pressure (remember, I'm at elevation -- your time/pressure might be different).

However, what I do for my stock(s) is that I freeze my scraps in large freezer bags.  Rotiserrie chickens from those "Oh, crap!  I forgot about dinner!" days, generate tasty stock because of the seasoned skin that no one eats.

The vegetable scraps come from carrot peels, potato peels, onion skins, bell pepper bits, tomato ends, cucumber, lettuce, squash, pretty much any vegetable except from the cabbage family (and beets, if you don't want a pink stock).

I simmer my vegetable stock a couple of hours, and my meat stock about 3-4 hours.  I like to use my counter-top roaster as it holds a nice quantity for canning.


This was 3 bags of mixed vegetable scraps and half a bag of carrot peels.  I forgot to take pictures of the chicken stock mixture, but for that I used one full bag of vegetable scraps and the other half-bag of carrot peels, plus two bags of chicken bones.

I ended up with 8 1-litre jars of vegetable stock.  I also canned 4 1-litre jars of chicken stock.  The rest of the chicken stock was made into a nice big pot of chicken vegetable noodle soup.  The chicken stock is in the front of the picture and the vegetable stock is in the back.  You can sort of see that the vegetable stock is a bit more clear than the chicken stock. (The chicken stock and one jar of vegetable stock still have rings on because they just came out of the canner and had not sealed yet.)


My go-to use for vegetable stock is making rice.  I usually use 1 jar every time I make rice.  I also have some beet stock for when I want a pinkish tinge to my rice.  I'm going to be experimenting with fruit stock soon.  I think it will be nice to cook breakfast grains with, or rice that would go with pork or meat/fruit skewers.  I'll keep you posted.


Sunday, 30 November 2014

My favourite Banana Bread recipe and what I do with it

Banana Bread is a comfort food of mine.  Moist, with not too much sweetness (not like cake).  However, it can still be a carb-avoider's enemy.  Unless . . . that's right . . . someone (ahem) alters the recipe in such a way as to make it an acceptable carb.

This is my go-to recipe and I change it up depending upon what I have available or what I'm in the mood for.

Protein Banana Bread

Makes 2 loaves

4 ripe bananas
1 can (540 ml/19 oz) white beans, drained and rinsed
1 1/2 cups Splenda (or white sugar)
1/2 cup olive oil
4 eggs
2 tbsp. vanilla extract

1 1/2 cups all-purpose flour
1 cup whole wheat flour
1/2 cup quick oats
2 tbsp. baking powder
1 tsp. baking soda
1/2 tsp. salt
1 tsp. cinnamon
1 cups chopped walnuts

Preheat oven to 350ºF.  Spray 2 loaf pans with Pam (or equivalent).

Blend all wet ingredients in a food processor.  Mix together all dry ingredients.  Add blended wet ingredients to dry, and stir until combined.

Pour into prepared pans and bake for around 50 minutes, or until toothpick inserted in centre comes out clean.

***************************

Now, like I said, I do change it up sometimes.  Today, for example, I had 2 ripe bananas.  So, I took out from the freezer my shredded pattypan squash, thawed it, and squeezed the excess liquid from it.

I also cut back the nuts a bit and added chocolate chips.

And, I added 1/2 tsp. dried orange zest, well, just because. (It ended up adding a brightness to the banana flavour.)

I made 1 dozen muffins (27 minutes in the oven) and 1 loaf.  As you can see in the picture, muffins are already missing.  LOL


Now, of course, due to the whole wheat flour and quick oats, these are a little more dense than some would like.  The flour/grain content can be adjusted to suit your own preference.  More all-purpose flour will make it fluffier.  Just keep the total grain content the same.


Sunday, 23 November 2014

Pumpkin & Beet Green Scones

Oh my!  These are so light, fluffy, and melt in your mouth delicious!  This is a really nice, savoury scone.

I used my homemade canned pumpkin (1/2 jar, with the liquid squished out in a strainer) and my blanched beet greens that I had frozen. 


Pumpkin & Beet Green Scones

Makes 12 scones

3 oz. frozen, blanched chopped beet greens, thawed (or any green, like spinach, kale, etc.)
1 1/2 cups all-purpose flour
1/2 cup whole wheat flour
1/2 tsp salt
1 tsp baking soda
1/2 tsp baking powder
1 tbsp sugar
1/3 cup cold butter or margarine
1 egg
3/4 cup buttermilk (or 3/4 cup milk with 2 tsp. vinegar)
2/3 cup canned pumpkin or squash, drained
3/4 cup cheddar cheese, grated

Preheat oven to 375°F.

Mix the flour, salt, soda, baking powder and sugar together. Cut in the butter with a pastry blender or your fingers.  Blend in the grated cheese. Make a well.

In another bowl, beat the egg and buttermilk until well combined. Mix in the pumpkin and beet greens.

Add the liquid ingredients to the dry and mix lightly until just combined.

Drop by spoonfuls onto parchment-paper-covered baking sheet.

Bake about 20 minutes until lightly browned.

Canned Winter Squash

It's been a tad busy lately and I kept putting off the canning of some squashes I had got on sale. I had 5 acorn squash and 6 small pumpkins that were giving me the stink-eye every time I passed them so I eventually got to them last week.

I didn't take any pictures of the process but I still have 6 butternut squash to do, and the process is the same, so I'll make sure to take pictures when I can the butternuts.

I ended up with 9 500-ml jars of acorn squash and 18 500-ml jars of pumpkin.


And, of course, from from those squashes came a delicious by-product: roasted seeds (pumpkin in the background and acorn squash in the foreground).  I cleaned the seeds, patted them semi-dry in-between 2 tea towels, tossed them with salt and EVOO, and then roasted them at 400ºF for 15 minutes, stirring every 5 minutes.